

How To Insert Photos In Photoshop In Columns
How to Add Prototype in Photoshop
Photoshop is an excellent tool for paradigm editing. We can open and add any image in Photoshop using its built-in features. Its layering feature allows us to open multiple images and composite them for a blended view of the image. For case, we tin can add a company logo or add more than 1 product to an image.
By adding images in Photoshop, we can create prototype graphics and provide a special event to grab the viewer's attention. We have to open an paradigm in the Photoshop workspace, and by opening an image, it volition exist bachelor for editing in our Photoshop workspace. When nosotros add a new paradigm, automatically information technology will be added as a new layer in the existing document file. It is useful for combining the different elements into 1 image.
At that place are several ways of calculation the images in the Photoshop workspace. We volition hash out few ways to add an image in Photoshop. Further, nosotros will see how to add multiple images and position them. To better sympathise how the prototype layers piece of work, you lot should have a good understanding of the layers.
Let'due south hash out how to add an epitome in Photoshop:
Adding an Image in Photoshop
There are different ways of calculation the images in the Photoshop workspace, but we are going to hash out the 2 near popular means followed by professionals.
By Dragging the Image into Photoshop
It is the most user-friendly manner followed past professionals to add together an image. To add a new image using this method, we have to drag the paradigm from our file arrangement and drop it to our workspace at its corresponding position. We can open up it with a new file or onto an existing file. If nosotros want to add it in a new document, just drib it to the tab bar of the certificate, and it will open the paradigm in a new certificate window.
If we want to add information technology to an existing document, then drop it to the document opened in the workspace. It will open up the image in a new layer. We tin can adjust the position of the image after dragging it onto the document; We tin scale, reposition or move this image according to our requirements.
Past Using the Open Feature
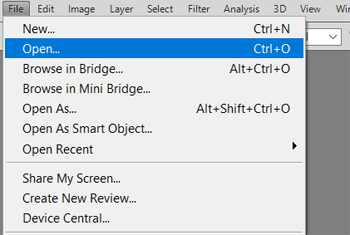
We can as well employ the open characteristic of Photoshop to open up an image. The open up choice resides nether the file menu. We can select the Open up option past navigating to the File-> Open option from the menu bar given at the top of the workspace. Alternatively, we can press the Ctrl+O keys equally a shortcut to open the epitome and add together it to the Photoshop workspace.
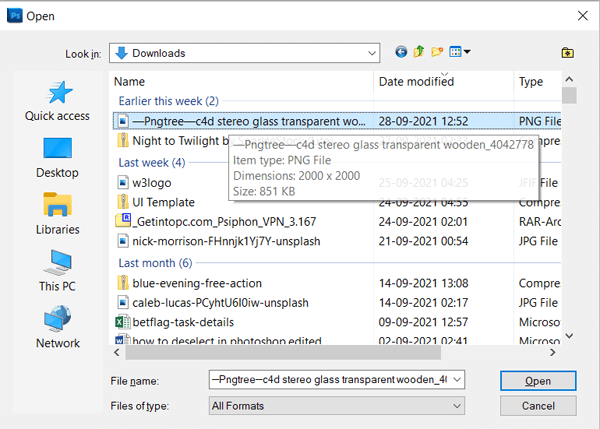
It will open the file explorer of your PC, navigate to the directory where the epitome is placed and select it.
It volition open up the image and add it to our workspace. We can perform editing on this image. Our prototype will look equally follows:
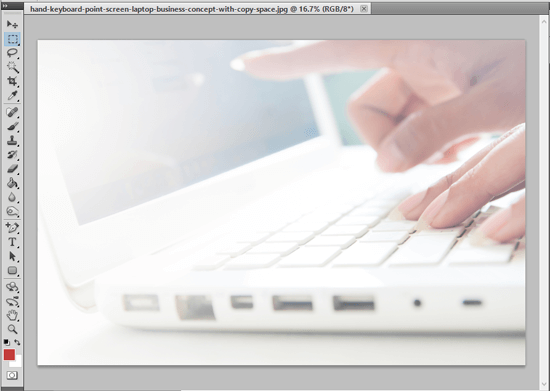
Now, the image is successfully added to our workspace. We can perform editing on this image. We can resize this image, add filters, crop, and perform other editing operations co-ordinate to our requirements.
Nosotros can as well add together images onto this image to composite several images for making consummate prototype graphics. Let'south understand how to add together images to an existing image.
How to Add Multiple Images in Photoshop
We tin can add multiple photos to our existing epitome. All the images volition be added in a new layer. The layer size will be equal to the existing image, but the image size will be different from the layer size. We tin conform the image size position according to our needs.
To open up the image onto an existing prototype, drag and drop the paradigm into our workspace. It will open the image over the existing image. It volition be opened equally follows:
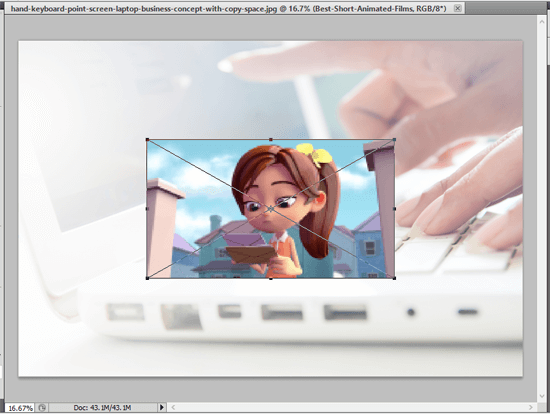
To resize the prototype, we can stretch the handles given at the edge of the added image. To stretch it equally from all corners, apply the Shift+Alt+Elevate shortcuts key combination. It will prevent the paradigm from distorting its dimensions and keep the original view of the prototype.
Once we are done with resizing the image, press the Enter key. After adding the prototype and specify the size, we can use different Photoshop tools such every bit movement, transform, filters, etc., to edit information technology. We need to target that detail prototype layer to edit the image that we want. The paradigm layers tin can be seen in the layers console given at the bottom correct corner of the workspace. If the layers panel is not visible in your workspace, you lot can manually view information technology past pressing the f7 primal or navigating to the Window-> Workspace menu.
How to Re-create Images within Two Projects in Photoshop
Sometimes, nosotros are working on two different projects, and we need to add an paradigm in our project from another project. We can simply copy an image from the project and paste it into another project. It will be placed at the aforementioned location where information technology is in the showtime project.
Notwithstanding, the copy and paste technique volition also work for the images exterior of the Photoshop workspace. We can copy the prototype from file system or web and paste it into our Photoshop workspace. But this technique works best for images that are already opened in Photoshop.
To copy an image, open up the document and press the Ctrl+C key combination or navigate to the Edit-> Copy menu. Make sure to select the image that you are copying.
Once the image is copied, navigate to some other project, press the Ctrl+V primal combination, or select the paste option from the Edit carte du jour. It will add the prototype that you have copied from the other project. Thus nosotros can copy an image in Photoshop workspace.
How to Add an Image Inside of a Shape
Sometimes we need to add an epitome inside a shape. Allow's suppose nosotros desire to place an image inside a circle, rectangle, middle, or any other shape. Depending on the type of shape you want to create. We can place our image inside of this shape using the clipping mask feature of Photoshop.
Using the clipping mask, nosotros tin can merge ii layers. The clipping mask stands for merging an image into a shape, where the term clipping stands for a shape or path, and the mask stands for the images.
Let's understand how to add an image inside of a shape.
Kickoff, we demand to create a new certificate. To create a new document, press the Ctrl+N keys and specify the document size and click Ok to create a new file. One time the file is created, nosotros tin can create shapes on it. For case, we are using the Ellipse tool. We tin activate the ellipse tool by pressing the U key or selecting it from the toolbox at the workspace's left.
Once the ellipse tool is activated, create a circle by property the Shift key.

Now, it'south time to add together the paradigm into our Photoshop workspace. We tin can use the traditional drag and drib technique to add the prototype to our file.
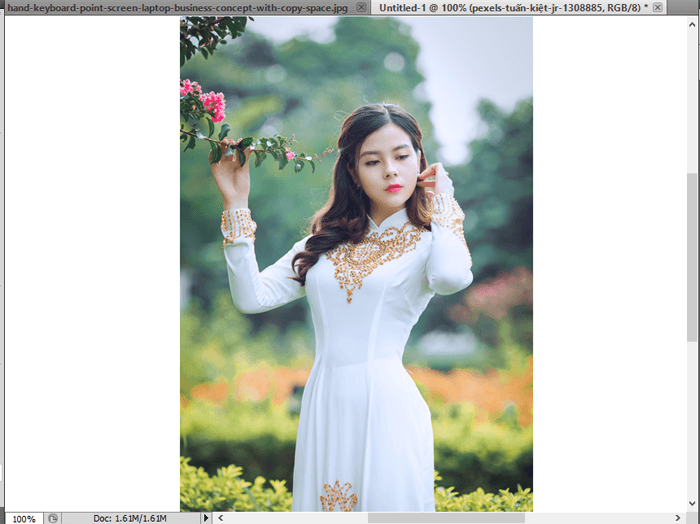
It will overwrite the existing shape layer. Don't worry; our shape layer is safe and will remain unchanged because the image volition be added to a new layer.
Now, navigate to the Layers console and conform our layers. Keep the shape layer at the bottom of the layer. The chief layer will always be at the bottom of the Layers panel.
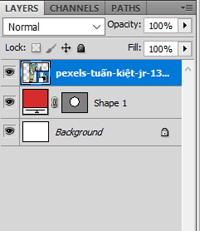
If the layers console is not visible, and then printing the f7 key or navigate to the Window-> Workspace-> Reset Essentials menu to reset the default workspace.
Now, create a clipping mask, press the Alt key and accept the mouse cursor over the border of the shape layer. The cursor pointer will be converted in to prune pointer. When it is converted, click on the edge of the layers. It will clip the image with the shapes. Consider the below image:
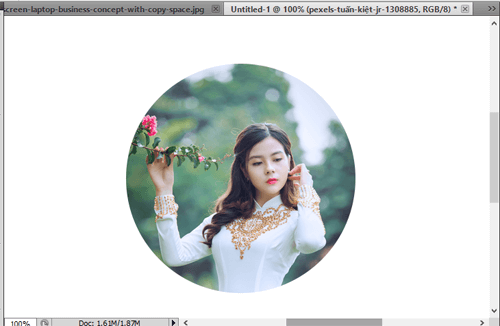
From the higher up image, we have precisely clipped the image with the circle shape. Just like the higher up-discussed process, we tin add any image inside any shape as per requirement. After the clipping mask is applied, nosotros can too customize our epitome, such equally calibration, resize, etc., after the clipping mask is applied. Visit our detailed tutorial on Photoshop clipping masks.
Summary:
Past adding images to Photoshop, nosotros can create image graphics and provide a special effect to catch the viewer'southward attending. It is useful for combining the different elements into ane image.
At that place are several ways of calculation the images in the Photoshop workspace. We have discussed few useful means, such equally the drag and drop open option and copy & paste options to add together an image in Photoshop. Further, we have discussed how to add multiple images and position them, and nosotros have too discussed how to add together an prototype inside a shape.
The above-discussed methods will be helpful for you lot to add together an image in Photoshop. Few of them techniques requires a good understanding of other Photoshop concepts such as layers and clipping mask.
Source: https://www.javatpoint.com/how-to-add-image-in-photoshop
Posted by: caseyunation.blogspot.com
0 Response to "How To Insert Photos In Photoshop In Columns"
Post a Comment